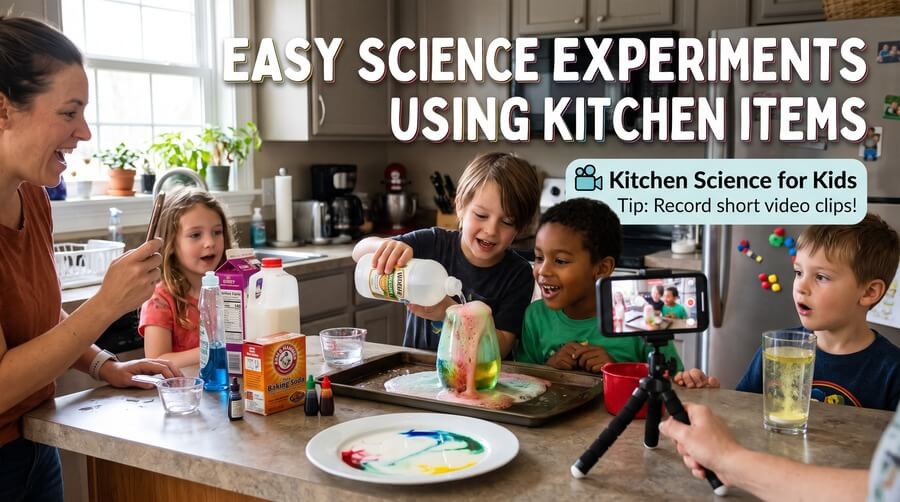
5 Easy Kitchen Science Experiments for Kids (Fun, Educational, and a Little Messy!)
Let’s be completely honest for a second: keeping kids entertained, especially on a rainy weekend or during school holidays, can feel like an Olympic sport. Last month, I found myself staring at two bored kids, a rainy window, and a ticking clock. I didn’t want to just hand over the iPad again. I wanted them to do something hands-on, something that would make them say “Wow!”
That’s when I discovered the magic of kitchen science kids absolutely love. You don’t need fancy lab coats, expensive chemistry sets, or a degree in physics to be the coolest parent on the block. Your kitchen pantry is already packed with everything you need to create erupting volcanoes, dancing fruits, and magic potions.
Over the past few weeks, we have turned our dining table into a science laboratory, and it has been the best bonding experience. Yes, there was a little bit of a mess, but seeing their eyes light up with wonder was worth every spilled drop of water.
If you are looking for easy science experiments using kitchen items, you are in the right place. Here are our absolute favorite experiments that will teach your little ones basic science concepts while having a blast.
1. The Classic Baking Soda and Vinegar Volcano
I had to start with this one because it is a rite of passage! I remember doing this when I was a kid, and watching my own children react to the fizzy explosion was priceless.
What You Need:
- Baking soda (2 tablespoons)
- White vinegar (1/2 cup)
- A squirt of dish soap
- Food coloring (red makes it look like real lava!)
- A tall glass or a plastic bottle placed on a baking tray (trust me, use the tray).
How to Do It:
- Place the glass or bottle in the center of your baking tray.
- Add the baking soda, dish soap, and a few drops of food coloring into the glass.
- Pour in the vinegar and stand back!
The Science Behind It:
When the baking soda (a base) mixes with the vinegar (an acid), they react to create carbon dioxide gas. The dish soap traps the gas, creating those wonderful, colorful bubbles that overflow like a volcanic eruption. My kids asked to do this five times in a row!
2. Magic Milk Colors
This experiment feels less like science and more like literal magic. It is incredibly calming to watch, and it’s perfect for younger toddlers as well as older kids.
What You Need:
- Whole milk (it must be whole milk for the fat content)
- Liquid food coloring (various colors)
- Dish soap
- Cotton swabs (Q-tips)
- A shallow dish or plate
How to Do It:
- Pour a thin layer of milk into the shallow dish.
- Drop 3-4 drops of different food coloring near the center of the milk. Don’t mix it!
- Dip the tip of a cotton swab into a little bit of dish soap.
- Gently touch the soapy cotton swab to the center of the milk and watch the colors explode and dance away from the swab.
The Science Behind It:
Milk contains fats and proteins. When you add dish soap, it breaks down the fat molecules. As the soap chases the fat around the dish, it creates currents in the milk that push the food coloring around, creating a beautiful, swirling tie-dye effect.
3. The Dancing Raisins
When I told my kids we were going to make raisins dance, they looked at me like I was crazy. This is one of the easiest kitchen science kids activities because it requires almost zero setup and clean-up.
What You Need:
- A clear glass
- Clear soda (Sprite, 7-Up, or Club Soda work best)
- A handful of fresh raisins
How to Do It:
- Pour the clear fizzy soda into the glass until it’s about three-quarters full.
- Drop 5 to 6 raisins into the glass.
- Watch closely! At first, they will sink, but soon they will start jumping up and down in the glass.
The Science Behind It:
Raisins are denser than the liquid, so they sink to the bottom. However, the carbon dioxide bubbles in the soda attach themselves to the rough surface of the raisins. These bubbles act like tiny floatation devices, lifting the raisins to the top. When the bubbles pop at the surface, the raisins sink back down to start the dance all over again.
4. Homemade Lava Lamp
If you grew up in the 90s, you probably had a lava lamp. Making a temporary one at home is ridiculously fun and visually stunning.
What You Need:
- A clear glass or plastic bottle
- Vegetable oil
- Water
- Food coloring
- Alka-Seltzer tablets (or any effervescent antacid tablet)
How to Do It:
- Fill the bottle about two-thirds full with vegetable oil.
- Fill the rest of the bottle with water, leaving an inch of space at the top. Notice how the water sinks to the bottom!
- Add 10 drops of your favorite food coloring.
- Break an Alka-Seltzer tablet in half and drop it in. Watch the colorful blobs rise and fall!
The Science Behind It:
Water and oil do not mix, and because water is heavier, it stays at the bottom. When you drop in the tablet, it reacts with the water to make carbon dioxide gas. These gas bubbles attach to the colored water and carry it up through the oil. When the gas escapes at the top, the colored water falls back down.
5. Oobleck: The Solid-Liquid Mystery
Prepare to get your hands dirty! Oobleck is a fascinating substance that acts like a liquid when you pour it, but like a solid when you squeeze or hit it. My kids played with this for over an hour.
What You Need:
- 2 cups of cornstarch
- 1 cup of water
- Food coloring (optional)
- A large mixing bowl
How to Do It:
- Put the cornstarch into the bowl.
- Slowly add the water while mixing with your hands. (Add food coloring to the water first if you want it colored).
- Keep mixing until it feels like a thick liquid.
- Now, try to punch the mixture quickly—it will feel rock hard! Then, scoop some up and let it ooze through your fingers like water.
The Science Behind It:
Oobleck is a “non-Newtonian fluid.” This means its viscosity (thickness) changes depending on the pressure applied to it. When you press it hard, the cornstarch particles lock together, acting like a solid. When you release the pressure, it flows like a liquid.
💡 My Top Tip: Record Short Video Clips!
If I can give you one piece of advice from my own experience with these experiments, it’s this: record short video clips on your phone! Don’t just take photos. You are going to want to capture the exact moment the “volcano” erupts or the moment they realize the raisins are actually dancing. Their gasps, their wide eyes, and their excited squeals are memories you will want to look back on. Plus, these short, funny clips make amazing content to share with grandparents or on your own social media (don’t forget to use the hashtags!).
Final Thoughts
You don’t need a lot of money or time to foster a love of learning in your home. The best part about these kitchen science kids activities is that they teach children that science isn’t just something in a textbook—it’s happening all around us, every single day, right in our own homes.
So, roll up your sleeves, grab some baking soda, and get ready to make some messy, beautiful memories with your kids!
Let’s Chat! (Leave a Comment Below)
I would love to hear from you!
- Which of these kitchen science experiments are you going to try first with your kids?
- Did you ever do the classic baking soda volcano when you were a kid?
- Do you have any other easy home science experiments that your family loves?
Drop your answers in the comments below, and let me know how your experiments turn out!